
Monday 29 September 2008
Genuine Fake Plates
Since these cost the same as normal plates I couldn't resist. I though having the D not GB was a step to far when it comes to talking to the police!
Sunday 28 September 2008
The Smurf Mobile
On seeing the blog Nathan has decided it looks like a Smurf Mobile which seems a pretty good name for it to me! I think a visit to our sign writer is in order for a logo.

Sound system
Sony digital radio which fits in better than the minging silver one that came with the van.

JVC 6x9 speakers for the rear (ordered sony £22 jobbies but they were out of stock so gave me these for the same price, normally £45!)
Some slightly less crappy ones for the front too for a massive £24!

JVC 6x9 speakers for the rear (ordered sony £22 jobbies but they were out of stock so gave me these for the same price, normally £45!)

Some slightly less crappy ones for the front too for a massive £24!

Putting it all back
After the spray job all the lights and plastics have been put back on. The black plastics have been sprayed as they were looking a bit tired.
Claire, the provider of suitable amounts of energy!


Claire, the provider of suitable amounts of energy!


Saturday 27 September 2008
At last it's blue!!!!
Started the day by flatting the high solids primer with 400 wet and dry. Then whilst letting the van dry (most of the day because it was foggy) I fitted the new stereo. Claire painted the inside of the back doors and I picked up a few bits. Namely new front brake hoses, an exhaust gasket, brake shoes and a new back box. I'm just glad to see it in top coat, but now the top looks shit so I may have to give that the once over too!


Friday 26 September 2008
Still more paint!
I have resealed the panel joins with sikaflex and the whole van has had several coats of high solids primer. I've now rubbed it back so it is ready for some more primer and finally a top coat of 1979 VW Kaupke Blau (who or what ever the f**k kaupke is!)

Kinda looks like Christo and Jeanne-Claude have been at it!


Kinda looks like Christo and Jeanne-Claude have been at it!
Monday 22 September 2008
Bodywork Progress
Another bit of acid etch undercoat and starting the high build primer that gives you something to rub back smooth.


Saturday 20 September 2008
Bodywork
I started on the bodywork today. Got the sander out and took all the rust spot back to bare metal before priming with an acid etch primer. There were only 3 small holes which is not bad for an LT!
Tomorrow I will surface fill and re-prime and I found some sikaflex to reseal the panel joints with. I also had time to give the wheels a quick coat of alpine white and spray the hubcaps silver.
Tomorrow I will surface fill and re-prime and I found some sikaflex to reseal the panel joints with. I also had time to give the wheels a quick coat of alpine white and spray the hubcaps silver.

Thursday 18 September 2008
End of the road for the 1978 LT28
After stripping out the last useful bits, waste water tank and lights etc, the van was ready for the scrap yard;

The lads took the wheels off for me which are now on the LT35 and really improve the non-power steering. Much easier to move around with a fork lift than a tow rope!!!
It fetched £121.80.Which means the interior, 4 wheels, water pump, wast water tank, bed/seats, cooker, grill, oven, sink, extractor, battery, windows, vents, steps and lights cost me £78.20. I'm sure there was probably a few more bits too.


The lads took the wheels off for me which are now on the LT35 and really improve the non-power steering. Much easier to move around with a fork lift than a tow rope!!!

It fetched £121.80.Which means the interior, 4 wheels, water pump, wast water tank, bed/seats, cooker, grill, oven, sink, extractor, battery, windows, vents, steps and lights cost me £78.20. I'm sure there was probably a few more bits too.
Wednesday 17 September 2008
Sound proofing
Managed to fit the 6m2 of sound proofing to the cab floor.
Also managed to fit the wrong hook up socket! Steve has started on the gas storage and spare tyre holder. The back doors have been hardboarded and the over cab area insulated.
The weekend should see most things finished.

Also managed to fit the wrong hook up socket! Steve has started on the gas storage and spare tyre holder. The back doors have been hardboarded and the over cab area insulated.
The weekend should see most things finished.
Tuesday 16 September 2008

What now?!?!?
Tomorrow I hope to finish the 230v electrics including hook up socket. I also want to fit the kitchen extractor and shelves. Hopefully the chemical toilet should arrive so I will fit that and the shower tray. The al fresco shit isn't much fun! Then there is the ply on the side and rear doors. I've got a load of sound insulation for the cab floor and maybe a stereo for the rear. Should only be bits and bobs after that, except the respray!!
I need to get it to a garage too. The steering play needs sorting along with a fuel leak, full service inc. cam belt. Hopefully after that it will rock hard!
I need to get it to a garage too. The steering play needs sorting along with a fuel leak, full service inc. cam belt. Hopefully after that it will rock hard!
The other window
I had to get Steve a couple of pints after struggling with this bast**d for about an hour!
It was originally the bulkhead window but makes a good side window. The door is mostly open a bit so a bigger window is pointless and would cost money too.

It was originally the bulkhead window but makes a good side window. The door is mostly open a bit so a bigger window is pointless and would cost money too.

Beer Festival
Made it!!!!
Then original seed for the camper van idea, the Cuckoo beer festival in the New Forest (well just on the boarder of it)
The van parked in the overflow parking field, nice of the owner to let us stay!
Me slightly worse for wear!
I managed to spill a pint in my shoe and a glass of red on the new carpet!!! Bugger
Then original seed for the camper van idea, the Cuckoo beer festival in the New Forest (well just on the boarder of it)

The van parked in the overflow parking field, nice of the owner to let us stay!

Me slightly worse for wear!

I managed to spill a pint in my shoe and a glass of red on the new carpet!!! Bugger


Thursday 11 September 2008
Not much to report

My work van broke down today so I only had time to give the seat backs their second coat of varnish and at the same time biscuit joint up an ash work top for the kitchen area as I decided the oak I had used was too dark.
Not sure how much I will be able to do tomorrow as I need to get a new alternator on the Trafic, bloody French rubbish!
Still not going badly considering I only picked up the van a week ago.
Wednesday 10 September 2008
Getting there
If I can blag some time on Friday with Steve I hope to have the Oak kitchen worktop fitted, the ash trim between ceiling and walls. Also the kitchen wall including double socket, shaver socket and water pump switch. Steve can also finish the leisure battery box he is so lovingly creating. The ceiling can have it's final coat and the over driver cupboard front fitted. That should just leave the mains hook up to be finished at a later date along with some form of water heating and the fitting of the shower tray/ toilet. Also probably about 300 other small jobs, like spraying it a completely different colour to keep Claire happy!
Progress
It's taking ages!!
Thanks to Steve we have considerably improved seats and table.
And the living area walls have been covered in Brazil Ply.

The drawer unit has a new top.

We have power!!! Well 12 volt any way. The consumer unit for 230v is fitted but needs the external hook up fitting.

4 of the 6 12v lights are in.


The ceiling only needs 1 more coat and the walls have all had to coats of satin varnish.
The hob, grill and oven are up and running as is the 3 way fridge on gas(It can be gas, 12v or 230v).
 The pump and tank are up and running. The taps need to be connected and the waste water tank fitted but for now a pipe out through the floor does the trick. We also have a fancy new water filling cap in the side of the kitchen as you open the back door. NICE ;-)


Thanks to Steve we have considerably improved seats and table.
And the living area walls have been covered in Brazil Ply.

The drawer unit has a new top.

We have power!!! Well 12 volt any way. The consumer unit for 230v is fitted but needs the external hook up fitting.


4 of the 6 12v lights are in.


The ceiling only needs 1 more coat and the walls have all had to coats of satin varnish.
The hob, grill and oven are up and running as is the 3 way fridge on gas(It can be gas, 12v or 230v).

 The pump and tank are up and running. The taps need to be connected and the waste water tank fitted but for now a pipe out through the floor does the trick. We also have a fancy new water filling cap in the side of the kitchen as you open the back door. NICE ;-)


Sunday 7 September 2008
What's to do still
Next comes the partition between kitchen and living area. Then Brazil ply walls, at the same time fitting the inset LED lights. Then the seats/bed can go in. The drawers need to be cut down and fitted. The shower tray and toilet need to go in. Then the mains consumer unit and 12v fuse board. Then the clean and grey water tanks need to be mounted underneath along with level indicators. Then the cupboard over the driver needs to be insulated, carpeted and closed off. I'll stop now as it's making me depressed!
Still, we should be able to use it for the Cuckoo Beer festival next weekend!!!
Still, we should be able to use it for the Cuckoo Beer festival next weekend!!!
The interior
9mm Stirling board flooring laid and carpeted that to a kind donation from Ag Mackeith (Halle's friend).
The ceiling was removed from the old van and due to some funky battening fitted to the new in a slightly better fashion. We had to use a piece of hardboard for the front section due to the new van being about 400mm longer than the old. The fridge/freezer is in place as well ae the hob, grill, oven, sink, water pump, toilet/shower cubicle and wardrobe.

The ceiling was removed from the old van and due to some funky battening fitted to the new in a slightly better fashion. We had to use a piece of hardboard for the front section due to the new van being about 400mm longer than the old. The fridge/freezer is in place as well ae the hob, grill, oven, sink, water pump, toilet/shower cubicle and wardrobe.


The scary bit!
Time to fully air condition the van. We had to remove the sliding window from the old van and fit it to the new. We had to nick the seal from the window in the door of the old van as the one that was on it was knackered. Anyone who says fitting a window with the string method is easy is full of shit! It's a pain in the arse, especially with 30 yr old rubber.
First the hole, arggg!
No picture of the window in yet, sorry forgot! It is in honest!
First the hole, arggg!

No picture of the window in yet, sorry forgot! It is in honest!
The Transplant
First things first. Insulation and wiring. Using 25mm Celotex and expanding foam the van was insulated on the ceiling and walls. The wiring for 230v and 12v was completed to allow 6x 12v led reading lights, 2x mains lights, a bathroom light, 3x double sockets, 1x shaver socket, pump, fridge etc etc.

The Low Down
The LT35 was in better condition with only some minor welding on the rear floor area. It was in original paint with only some half arsed touch ups and unlike the LT28 actually drove! Not to mention indicator that blinked and lights that worked as well as a clutch that operated.
The Plan
On discovering the clutch had welded together a plan was hatched and another vehicle was needed, enter the 1991 LT35
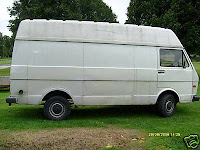


The Donor Camper
A 1979 LT28 bought for £200


Not much metal left in it. You could see daylight through most of the floor around the edges, but the inside wasn't too bad.


Not much metal left in it. You could see daylight through most of the floor around the edges, but the inside wasn't too bad.
Subscribe to:
Posts (Atom)